Forwarding events from BMC Helix Operations Management to third-party applications
Consider the following scenario to understand how this capability helps.
Before you begin
Before creating a policy, make sure that the BMC Helix Operations Management on-premises connector is connected. For more information, see Configuring-the-BMC-Helix-Operations-Management-on-premises-connector.
To create an automation policy
- Log in to the BMC Helix Intelligent Automation console and click Policies > Create Automation Policy.
- Provide the name and an optional description.
- Select the execution mode as Automatic.
When you select the automatic execution mode, the schedule option is displayed, which is required for forwarding events based on a defined schedule. - Specify the start date and time, end date and time, or no end date if you want this policy continuously.
By default, the policy runs every 2 minutes. You can change the frequency based on your requirements.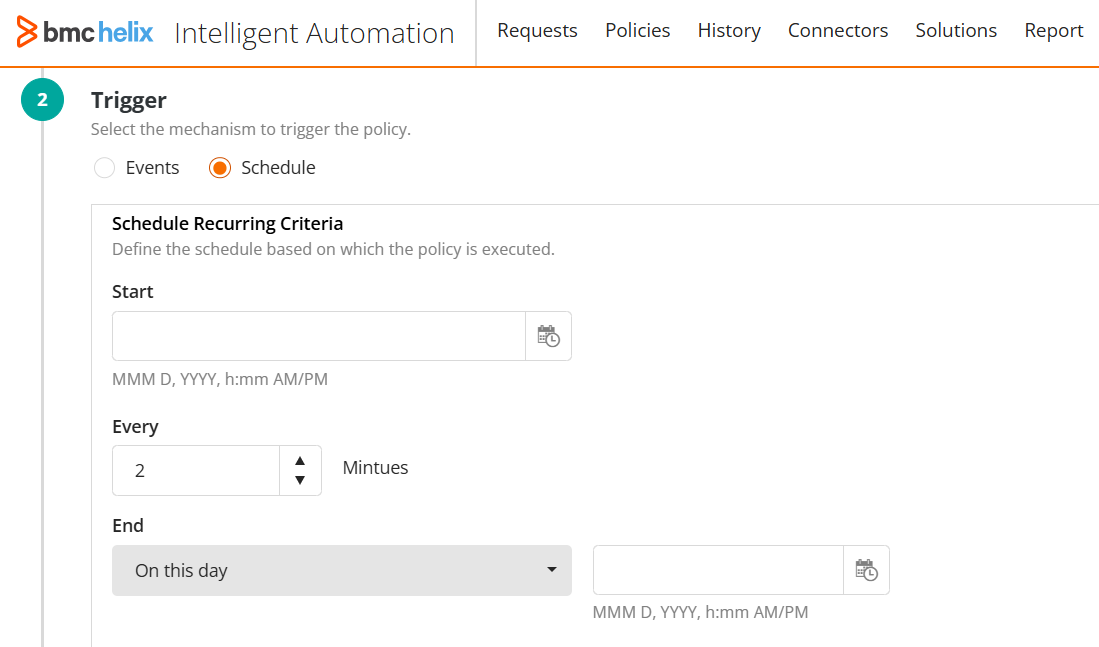
- Click Select Action to and perform the following steps:
Select the BMC Helix Operations Management connector.
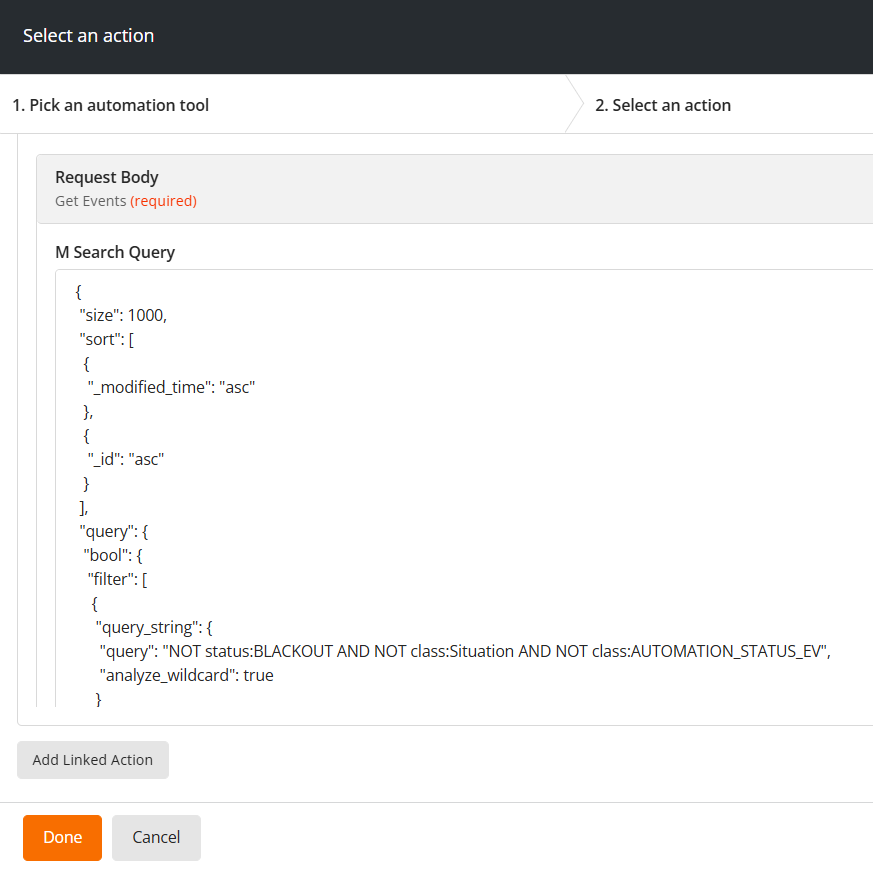
- Select the Get Events action.
The Get Events action consists of two actions. First, you retrieve events in JSON format based on the specified parameters and then you add a linked action that forwards these events to the external application. - In the Request Body field, update the JSON query based on your requirement.
- Click Add Linked Action.
The Generic REST action is displayed.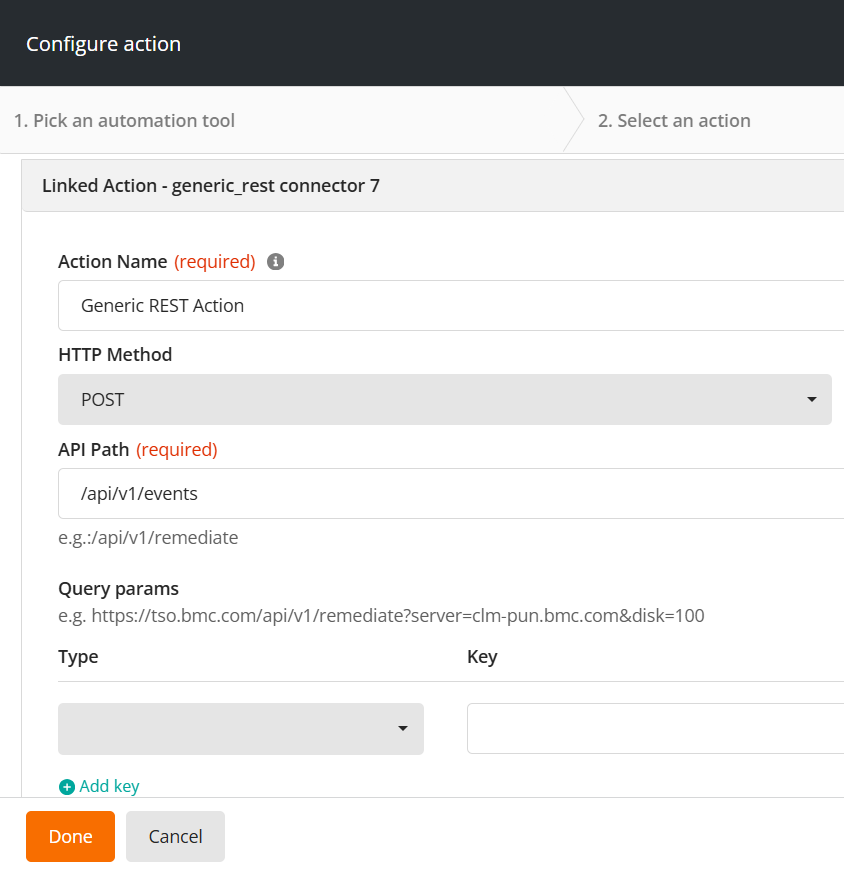
Specify the following parameters:
Field
Description
Action Name
Specify the name of the action.
By default, Generic REST Action.
HTTP Method
Select POST.
API Path
Specify the API path name followed by /events.
Example: /api/v1/events
Query Params
Specify any additional parameters you might want to use.
- Specify the parameters and click Done.
The Get Events action is displayed along with a label for composite action. You can edit or delete this action but cannot add any more actions.
(Optional) Specify tags in a key-value format.
- Select Publish Policy and click Save.
The automation policy is saved and its status is displayed as Published. On the History page, the policy status is displayed as Running, however, events are forwarded based on the specified schedule. - Continue with the next step to verify whether events are forwarded to the target application.
To verify whether events are forwarded
- Log in to the BMC Helix Intelligent Automation console and click History.
- Search for the policy that you created for forwarding events.
- Click to open the policy details.
When the policy is in a running state, the Output tab displays the total number of events forwarded and the response and the last successful execution date and time.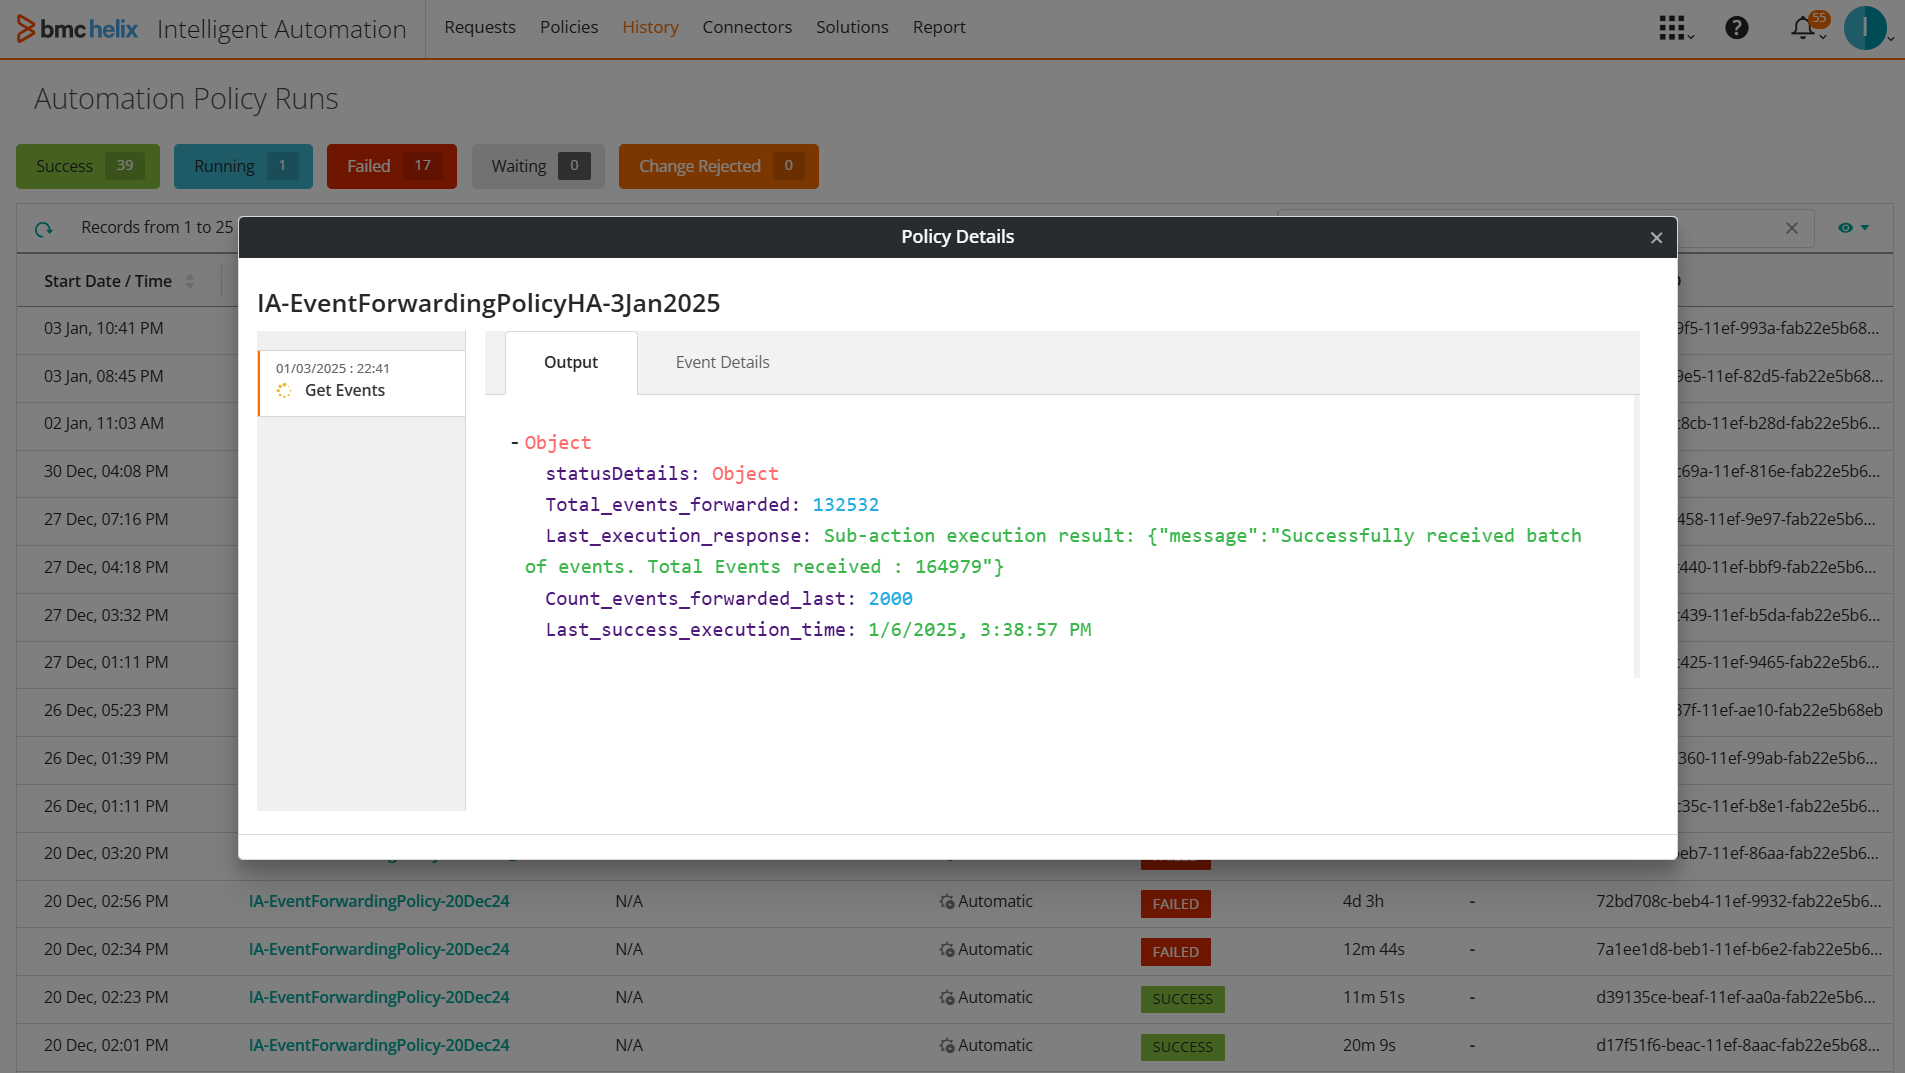
Tip: For faster searching, add an asterisk to the end of your partial query. Example: cert*