Automated Unit Testing for CICS
This tutorial will introduce you to BMC AMI DevX Total Test. Total Test allows for rapid creation of COBOL CICS unit tests. Total Test can create Data stubs and Programs stubs allowing you virtualize those components of the application.
NOTE: If you wish to rerun this Test Drive Script, simply restart the Test Drive script from 'Setting Up' section.
- This tutorial will introduce you to BMC AMI DevX Total Test.
- Total Test allows for rapid creation of COBOL CICS unit tests. Total Test can virtualize testing, meaning all subprogram calls, data accessed, and API calls are virtualized or stubbed out and the program is tested in complete isolation from external dependencies.
- Total Test uses BMC AMI DevX Code Debug to collect program call parameters, I/O from (QSAM, VSAM, Db2, IMS BMP, IMS MPP, CICS) as well as the results data.
- Test cases can then be run independently using stubs, removing the dependency to data/program accessibility.
Instructions:
- This guide assumes you have completed the "Getting Started" script.
- This guide contains many screenshots to provide a visual reference.
- Every action you must take is in the Info Box.
Please note each place that you must enter your own specific userID or number.
- You must complete each step before proceeding to the next to successfully follow the test drive script.
Do this
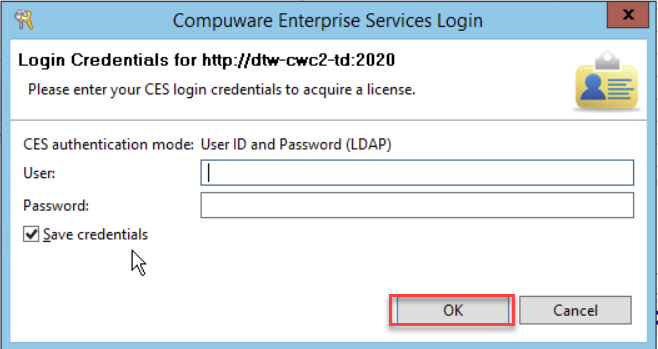
If at any time during the execution of this script the Compuware Enterprise Services Login popup is shown, enter your test drive ID and password under User ID and Password, check the Save credentials box and then depress the ENTER key or click OK.
Setting Up
Total Test Unit Test uses the DevX Code Debug command 'Generate Test Case' to create the Unit test projects. After creating the unit test cases, we will use Project Explorer to view and run the unit test case.
Do this
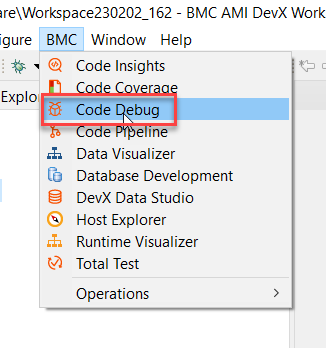
Open BMC AMI DevX Workbench for Eclipse . Open the DevX Code Debug perspective from the menu option.
Do this
Expand 'Run' from the menu option and scroll down to the 'Debug Configurations'.

Do this
Right Click 'DevX Code Debug CICS Debug' and select New Configuration.
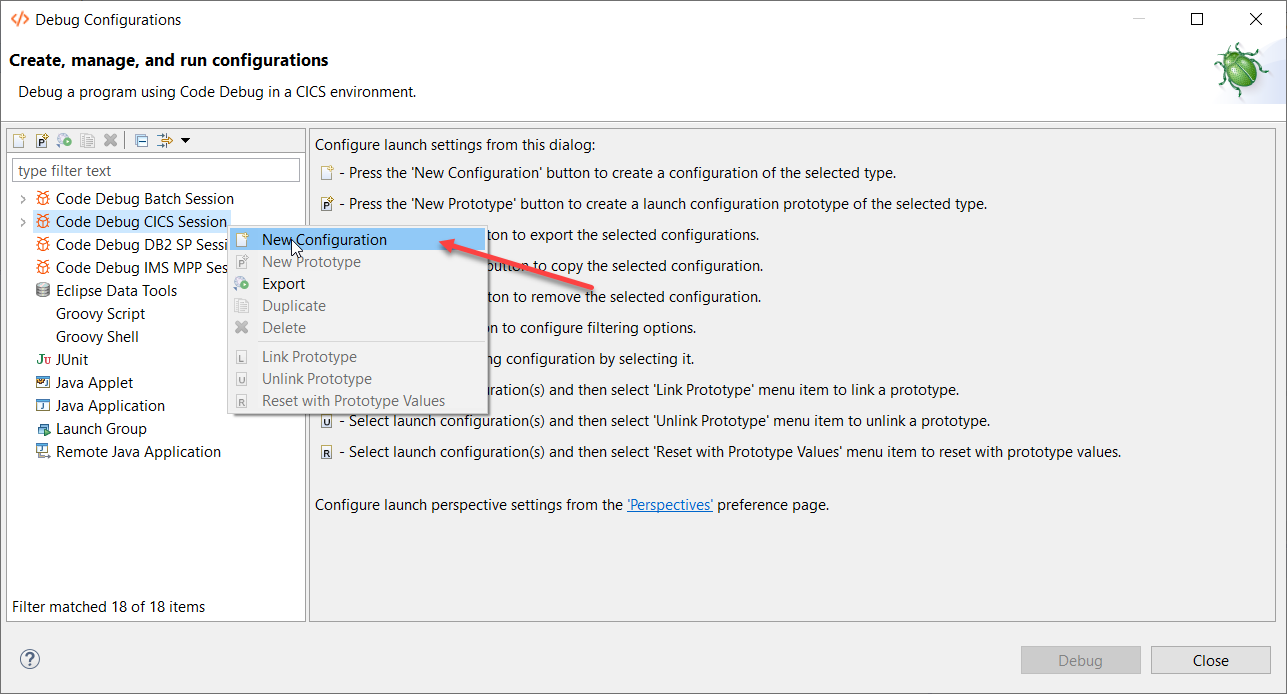
This will open the Debug Configuration dialog.
Do this
Enter Name MyTTTCICS to the debug configuration. Select 'TestDrive' on the Host Connection dropdown. Select Region HCCAC014 and enter program LGICUS01 in Load Module field. Click Debug. (You may have to re-enter your userid and password again).

Do this
Close the Cheat Sheets* as indicated in the screenshot.

*Cheat Sheets can be a very helpful tutorial tool, but for our test drive we do not need them, so closing them gives us more screen real estate to work with.
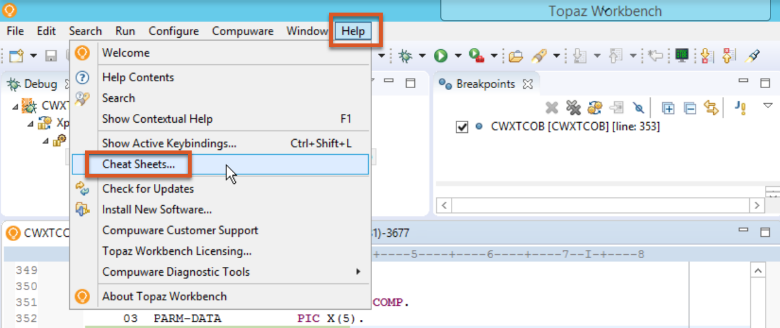
If you need to bring up cheat sheets again, click Help then select Cheat Sheets.
DevX Code Debug for CICS displays the source listing with a default breakpoint placed at the first executable. The debug session has not begun yet. Now you will need to invoke the Application Transaction to begin the debug session.
This application's transaction is a 3270-terminal transaction, we will use the Topaz 3270 emulator to execute the transaction. However, DevX Code Debug CICS also supports transactions invoked from a Web or other interface.
Do This
Click on the 3270 Emulator Icon.

The emulator will display, it has been configured to access the TestDrive system.
Do This
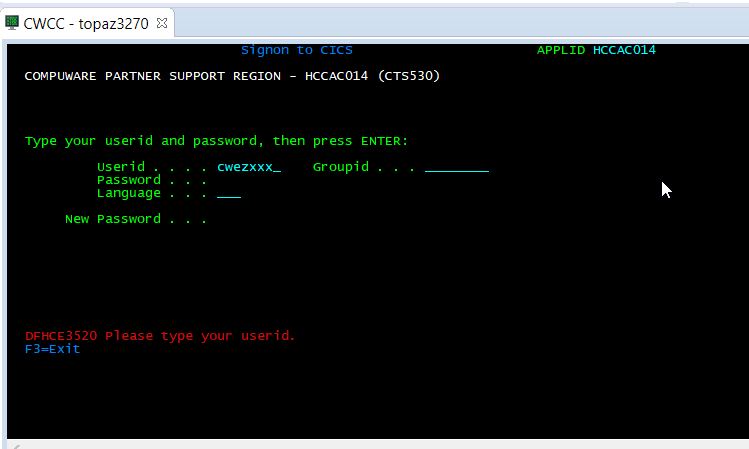
Type 'I HCCAC014' to access the CICS region where the transaction will run.

Do This
Sign into the CICS region using the TSO id and Password provided for the Test Drive session and Hit Enter.
Do This
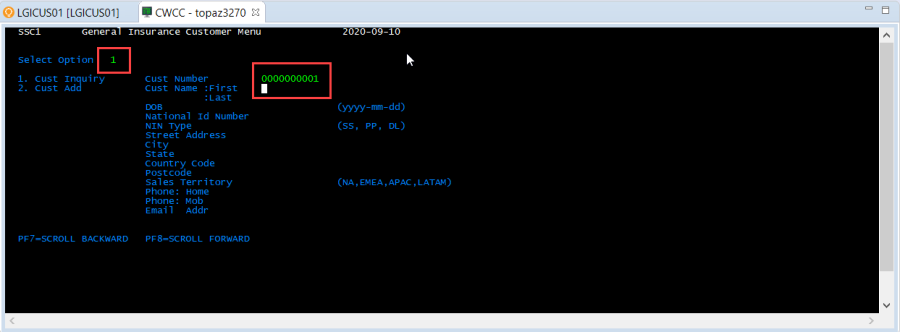
At the blank screen enter the Application transaction 'SSC1' and Hit Enter.

Do This
Enter Select Option 1, Cust Number 0000000001 and hit Enter.
Do This
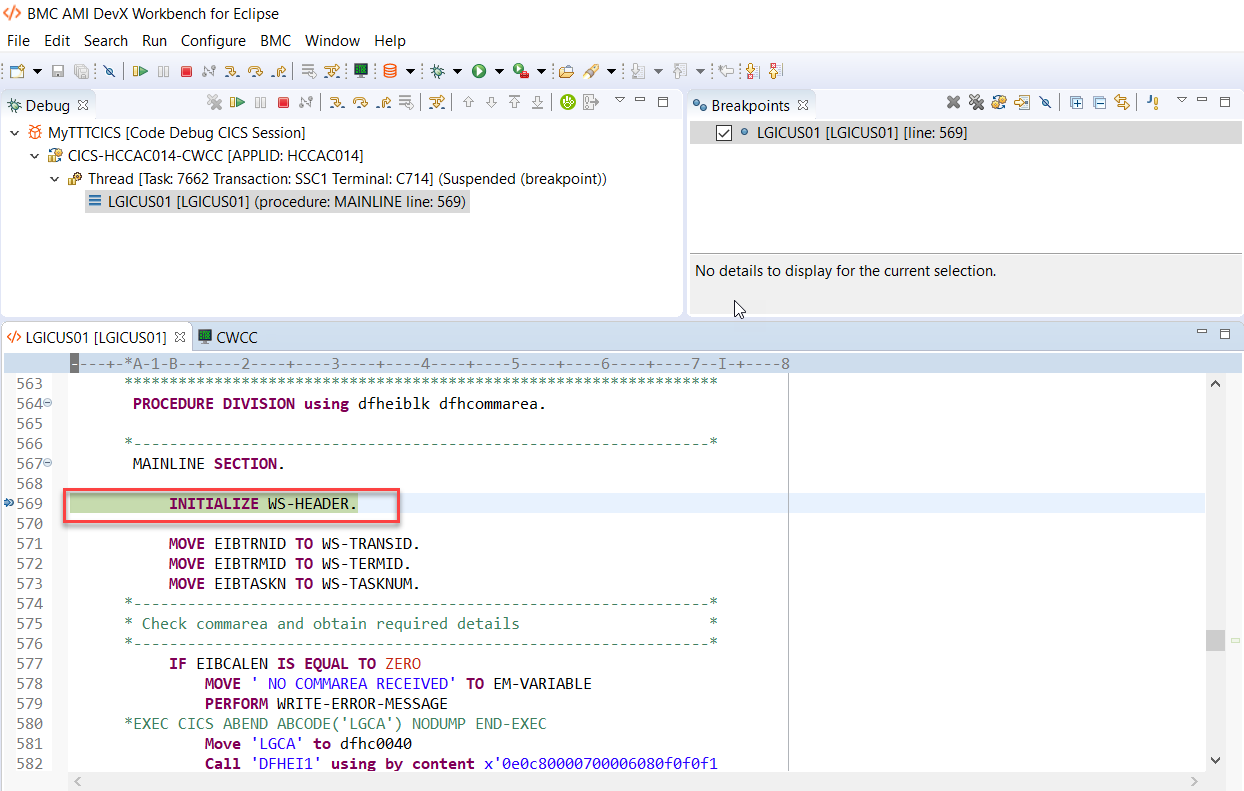
In the source code view, right-click to display the context menu.

The DevX Code Debug perspective will display several views.
Do This
Select 'Record Test Case'.

Once selected the Record Test Case dialog box will appear, next to the Project field.
Do This
Click New… to create a new project.

Note: The project field may or may not be populated when this dialog box is first displayed. This Total Test dialog is used to determine what Stubs to create as part of the Test Case.
Do This
Enter the project name MyTTTCICSProject and select Finish.

Do This
Click OK.
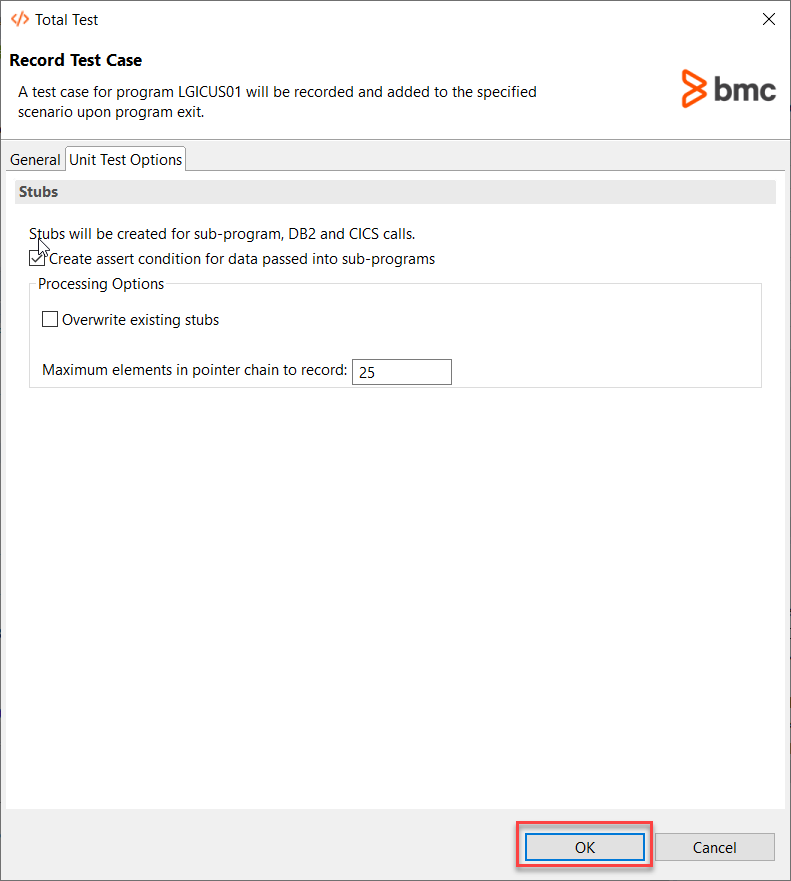
The tab 'Unit Test Options' portion of the Record Test Case dialog is different for CICS.
For CICS, live program execution is not available for unit test execution. Therefore, stubs will always be created for sub-program, Db2, and CICS calls.
Check (default) the Create assert condition for data passed into sub-programs checkbox for Total Test to generate sub-program assertions for sub-program stubs. Sub-program assertions validate all the data that is being passed into a sub-program call just like a Write Assertion validates all the data that is passed into a Write I/O call.
Do This
Click the Resume icon on the toolbar or press F8 to resume program execution.

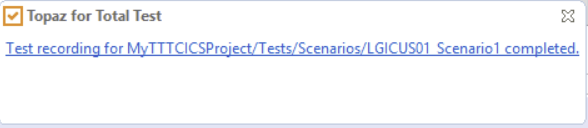
Once you see this banner the testcase has been created.
Do This
After the program terminates, open the Host Explorer perspective.

There is a message in the Console that indicates that the test case has been created.
Run the Unit Test
Total Test creates a Project folder in Project Explorer. The project contains all the components to replay the newly created test case.
Do This
Select the Project Explorer tab. Navigate to and expand the project that was just created and expand the Unit Test folder.
Expand the Stubs folder in the project.


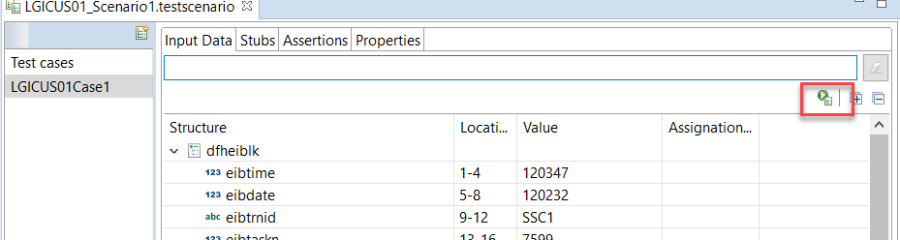
The Input Data tab at the top will show the data passed to the program.
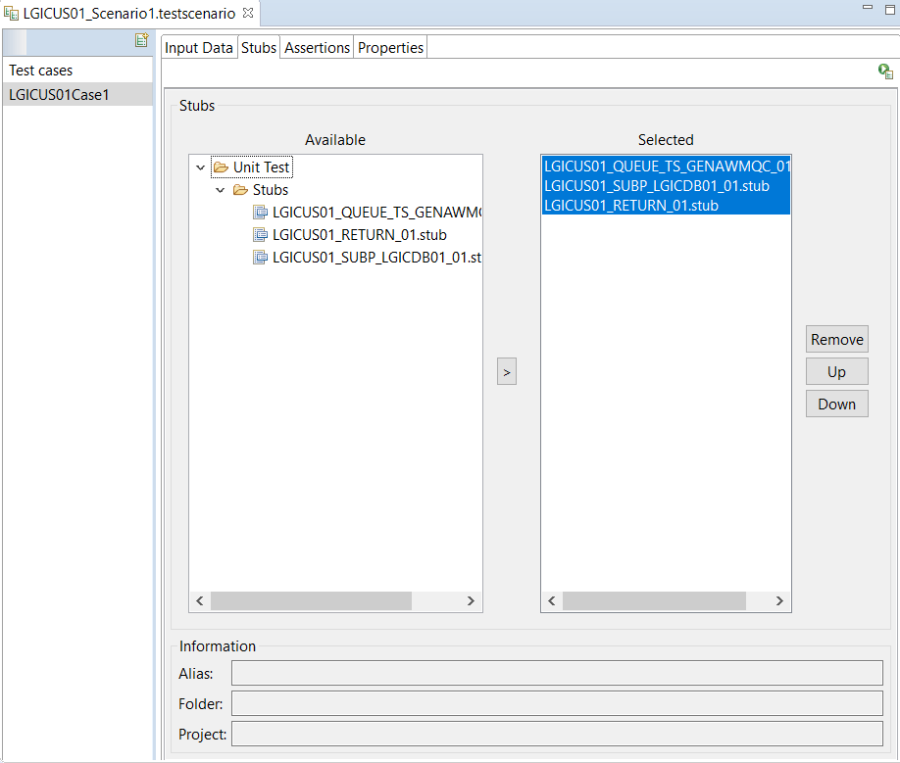
The Stubs tab allows you to see the stubs that will be used when the Unit Test is run. DB2, IMS, or CICS APIs must use all stubs.
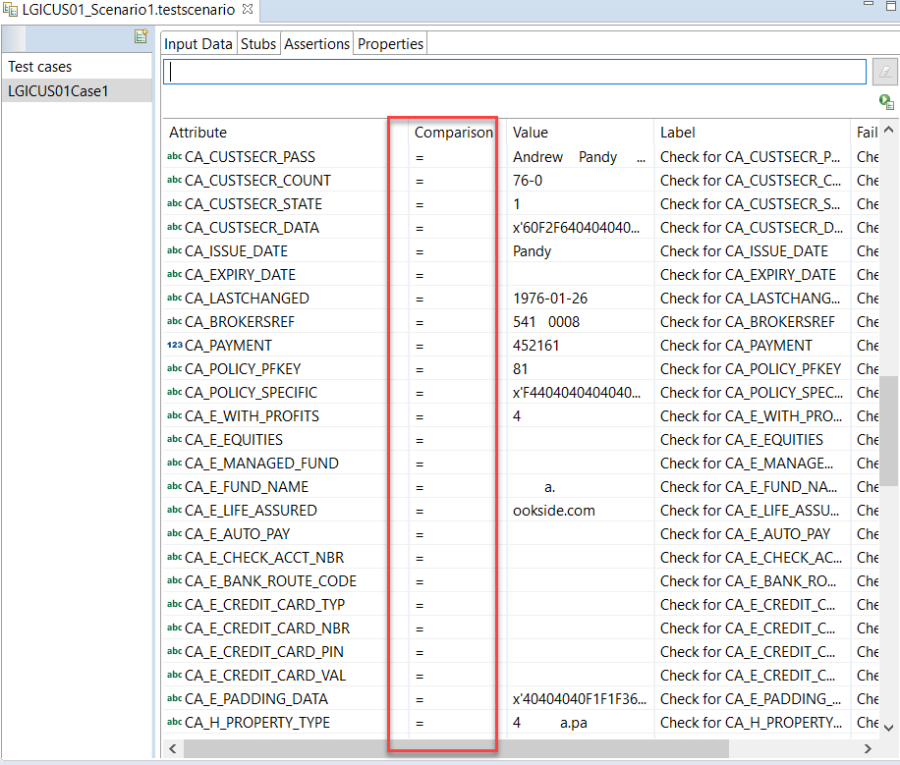
The Assertions tab is where Comparison and Expected values are displayed. These are values Total Test will validate against when the test case is replayed.

The Properties tab allows you to document notes and additional information pertaining to the Unit Test Scenario.
Do This
Return to the Input Data tab of the Test Case Scenario.
Click on the Run Test Scenario icon on the toolbar
If you get the Logon to Repository see page 3.
Do This
Select Test Drive in the Host Connection pull down menu, click on The Unit Test Tab.
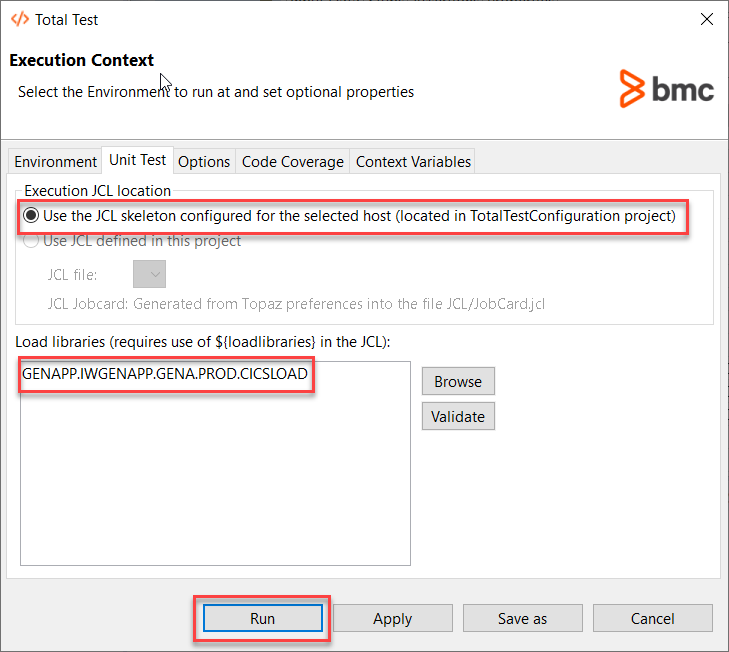
Select 'Use JCL skeleton configured'. Notice that the CICS program will now be run in Batch mode.

The Execution Context dialog appears
Do This
Verify that 'GENAPP.IWGENAPP.GENA.PROD.CICSLOAD' is in the Loadlib section then click OK.
Reviewing the Unit Test Results
When the Unit Test completes, the report will be displayed in the Editor panel. This report will show a Success rate, number of failures, and errors and where the failures occurred.
This concludes the Automated Unit testing for CICS using Total Test.

Close all the open tabs in the editor pane.
Restarting This Script
At any point should you need to restart this Test Drive script, follow the instructions below:
You can reuse the same Launch configuration to start the debug session. For the Total Test Project use the same project name and add a '1' to the name to make it unique.
Next Steps
For more information about "Mainstreaming the Mainframe" visit our Mainframe DevOps site.
Comments
Log in or register to comment.