Creating a relationship rule
BMC CMDB provides recommended relationship rules on which you can normalize relationships in all data sets. You can also create additional rules for normalizing relationships based on your requirements.
For more information about recommended relationship rules, see Normalization and best practice relationship rules.
To create a relationship rule
- On CMDB Portal, click Configurations.
From the list, select Manage Normalization Rules > Features.
Click the Relationship tab.
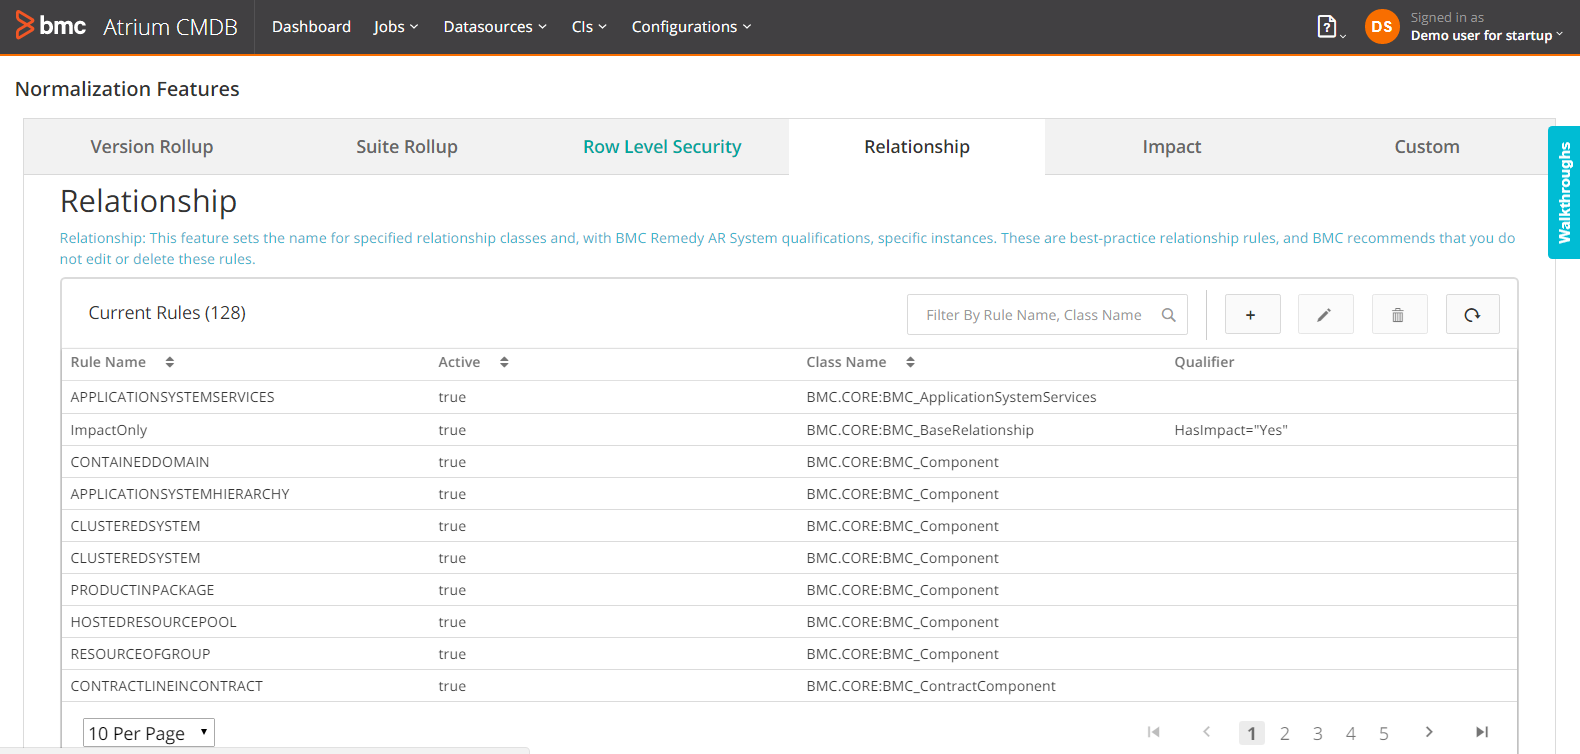
- To create a new relationship rule, click
 icon. The following page is displayed.
- On the Create Relationship Rule page, configure the following parameters:
- Rule Name — Enter a unique, descriptive name for the rule.
- Active — Click to activate the rule so that the Normalization Engine can apply the rule on data sets for which the Relationship Name feature is enabled.
- In the Conditions section, configure the following parameters:
- Class Name — Select the relationship class for which you want to create a rule.
(Optional)Apply To Subclass — Select this check box if you want to apply the rule to the subclasses of the selected relationship class.
Note
When you set rules for a relationship class at both parent and child class levels, the child class rule overrides the parent class rule.
(Optional)Qualifier — Enter the qualification rule for the class, or to build the qualification rule using the Qualification Builder, click
 . For information about using the Qualification Builder, see Using the Qualification Builder.
Note
The relationship rules apply to all data sets in BMC CMDB. To define a rule for a specific data set, include the
datasetIDattribute in the qualification rule.
- In the Relationship Details section, configure the following parameters:
- Source Class Name — Select the source class in the relationship.
- Destination Class Name — Select the destination class in the relationship.
- (Optional)Apply To Subclass — Select this check box if you want to apply the rule to all subclasses of the selected Source Class Name and Destination Class Name.
- (Optional)Source Qualifier and Destination Qualifier— Use Remedy AR System qualifications to define the CIs in the source and destination classes to which the rule applies. Enter the qualification rule, or to build the qualification rule using the Qualification Builder, click . For information about using the Qualification Builder, see Using the Qualification Builder.
- In the Attribute Values section, enter the Relationship Name that the Normalization Engine must apply to the
Nameattribute of the relationship. Alternatively, you can click and use the Qualification Builder to build an expression value that the Normalization Engine must apply to the Nameattribute of the relationship. For more information, see Using the Qualification Builder. - Click Save.
To edit a relationship rule
Best practice
- On CMDB Portal, click Configurations.
- From the list, select Manage Normalization Rules > Features.
Click the Relationship tab.
Select a relationship rule that you want to edit, and click
 .
.In the Edit Relationship Rule dialog box, modify the fields as per the steps in To create a relationship rule.
Click Save.
Note
You cannot modify the class name of an existing relationship rule.
To delete a relationship rule
- On CMDB Portal, click Configurations.
- From the list, click Manage Normalization Rules > Features.
Click the Relationship tab.
- Select the unwanted relationship rule, and click
 .
. In the Delete Relationship Rule dialog box, click OK, to confirm the deletion.
To enable or disable relationship rules for a data set
- On CMDB Portal, click Configurations.
- From the list, click Manage Normalization Rules > Dataset Configurations.
- On the Dataset Configurations page, select the data set for which you want to enable or disable the relationship rule, and click .
- On the All Datasets Configurations page in the Supported Features section, select or clear the Relationship check box to enable or disable the feature.
Click Save to apply the change.
Note
Only rules that are active are executed.
Comments
Log in or register to comment.