How to Deploy SQL Server 2005
This page provides the required information to post OS provision Microsoft SQL 2005 in your environment. It contains the following sections:
Stocking the Code
You will need to copy the CD or CDs to the Application Server or you can reference them in a share. If there are two CDs, you will need to copy both of them in a single directory. For example, I copied the SQL2005 CD into D:\Bladelogic - Depot\SQL2005. You also need a copy of psexec to start the command line installation.

Creating and Modifying the Silent install file
Microsoft SQL2005 ships with a template.ini file, which is located on the root of the CD, depending on the version. This file contains the details for the installation of SQL2005 through a command line or a template/silent.ini file. This page focuses on the installation with an *.ini file.
The first step is to edit the *.ini file to accommodate the components that you will be installing. The file originally contains more information than needed. Therefore, you can strip down the original template.ini file and leave only the sections that are necessary for an out-of-the-box installation. Below is an example of a file that was used in a particular installation.

This package is aimed at installing ALL components. You can reference the template.ini file if you want to install fewer components.
When packaging software that has the silent command line or *.ini file, I typically copy the code to a target host and make the necessary changes and run the installation to validate that it works properly. The following steps can be used to create a file deploy job within BMC Server Automation and deploy it to the target host.
To create a File Deploy Job
- Select New > File Deploy Job.

- Enter a Name and Description; add the source by clicking on the ellipsis …

- Navigate to the Application Server and select the SQL2005 source folder. You will then need to grab psexec.exe from the PStools folder.

The Source depicts the actual location, and the Destination will be the C:\ of the target.

- On the next panel, select the target that you want to use for testing.

- Step through the next few panels. In this example, no information was entered on these panels.


- Select Execute Job now.

- Step through the remaining panels.

- Click Finish to Execute the Job

- Validate that the code made it to the target host.

Command line installation with an *.ini file
Now that you have the code on the target host, you can also test the command line installation.
Use a command similar to the command depicted below. Note that this is for testing the installation, and it will need to be modified within Bladelogic. Note that I also use thesetup.exe /qb string so that I can see the installation progress.

The actual command with psexec will be:psexec localhost -u administrator -p ******** "c:\tmp\stage\SQL2005\Servers\setup.exe" /qb /settings "c:\tmp\stage\SQL2005\silent.ini"- Wait for the Initial System check of the Installation to complete.

- Now wait for the SQL Setup Progress to complete.

- Through the Control Panel, validate that SQL was installed.

- Launch SQL Server Management Studio

- Validate the logon to the SQL Server.

You have successfully installed SQL 2005 
Packaging SQL2005
- To deploy SQL2005, you must create a BLPackage.

- Add a package name and a Save in location.

- On the next panel, add Live Server objects; in this case we are adding the SQL2005 source code.

The source code is located on the application server, D:\Bladelogic - Depot\SQL2005-rjm\SQL2005.
The SQL2005 Server Objects are added.
- On the next panel, select the following Package Item Options:

- Step through the Properties screen, accepting the standard properties.

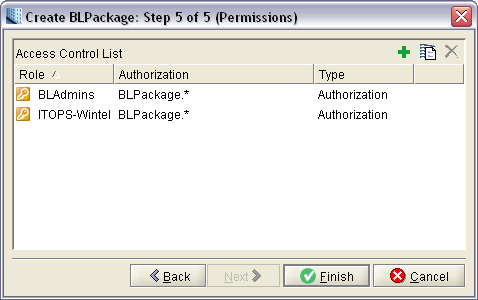
- On the Permissions panel, add any additional Permissions to other roles that may be required to package and deploy SQL2005. Then click Finish.
- During the copying of package files, you are prompted to edit the package. Select Yes.


- In your Initial SQL Package, you will want to change the /D/Bladelogic – Depot/SQL2005-rjm. Otherwise, that is where the package will be created. Note the silent.ini file that you use to validate the installation.

Since such items as BLPackages and Jobs are copied to the tmp/stage directory, I used that directory.

Adding additional files in the BLPackage
This package will require additional files as well as an external command.
- Right-click anywhere in the BLPackage, and select Import Assets.

- In the Import dialog box, select Live server objects.

- On the next panel, browse to the Application Server and grab the necessary files, in this case psexec.exe.

Select psexec.exe from SANDAPBL1/Bladelogic – Depot/PsTools/
The server objects are selected.
- On the Package Item Options panel, use the following options:

- Step through the Properties panel, accepting the standard properties.

- On the Permissions panel, you might need to add additional Permissions to other roles that may be required to package and deploy SQL2005. Then click Finish.

- Again, after the object is imported, you will need to change its location. I typically put psexec.exe or other executables into /C/Windows/ so that you can call them from anywhere.

Creating Local Properties in the BLPackage
Since we are using psexec, we need to specify a username and password through BLPackage properties.
- Click on the local properties of the BLPackage. Click on the green plus sign to add a username and password property.

- Enter Name, Description and Default value. The type for this local property will be Simple and String, and set it as Editable and Required.

- For the password you will want to change the Type to Encrypted String, so as to keep the password from being displayed in clear text.

Your local properties should look like this:
Adding an external command for the installation
To kick off the installation, you will need to create an external command.

We can reference the command that we used to test the command line installation (as described in Command line installation with an *.ini file).

Deploying SQL2005 through a Deploy Job
The last step in this process is to take the BLPackage and create a deploy job to run against your target server.
- Right-click the BLPackage and select Deploy.

- In the General panel, provide a Name and Save in location.

- The target host in this example is in a Workgroup, so you can leave these settings as they are.

- On the Targets panel, select your target host.

- If you have Notifications and SNMP setup, you can supply the email and SNMP trap server/address on the Default Notifications panel.

- On the Phases and Schedules panel, I typically clear the Phase Selection->Simulate option. You can select to execute now or to save it for later.

- On the Job Options panel, accept the standard deploy options.

- On the Phase Options panel, you can accept the default options, if you choose to.
I typically clear the Test for Sufficient staging directory space on target for phase: option.
- Step through the Properties panel, accepting the standard properties.

- On the Permissions panel, you might need to add additional Permissions to other roles that may be required to package and deploy SQL2005.

You have now successfully provisioned SQL2005

Comments
Log in or register to comment.