Creating a patch catalog in offline mode for AIX
In an air-gapped environment, in which Internet access is not available to the Application Server, you download the metadata and payload information first to a server outside of the BMC Server Automation environment using a utility provided by BMC. For information about this utility and how to use it to download patches, see Offline Patch Downloader utility.
The following procedure assumes that the downloads to the offline repository are done. Use this procedure to create a patch catalog in Offline mode, using the previously downloaded patches.
- In the console Folders view, expand the Depot folder.
- Navigate to an existing folder or create a new folder for the patch catalog. The examples in this procedure use a folder named Workspace.
- Right-click the folder in which you want to store the new catalog and select New > Patch Catalog > AIX Patch Catalog.

- On the General panel:
- In the Name field, provide a name for the new catalog.
- In the Description field, optionally, provide a description of the new catalog.
- In the Save in field, verify that the displayed path name is the folder in which you want to save the catalog. If necessary, you can browse to another location.
- Click Next.

- On the AIX Catalog panel, select Source From Disk Repository (Offline Mode). This option downloads patches to a server from a local system or a system that is available to the Application Server.
- In the Repository Options section, provide information in the following required fields:
- Payload Source Location ---- Browse to the location of the metadata and payload files. This is the target location used by the downloader utility. It must be a server with an RSCD agent installed on it.
- Repository Location (NSH Path) ---- Browse to an appropriate location to serve as a repository. The repository must reside on an AIX system that has an RSCD agent installed on it.
The Payload Source Location and the Repository Location can be the same path if the downloader utility downloaded files directly to the Repository Location. This scenario makes the process slightly more efficient, and it avoids having two copies of each file. This is achieved if the downloader utility was executed on an AIX machine.
If the two locations are different, then you must ensure that either the Payload Source Location is an AIX system with RSCD Agent installed on it, so that the downloader utility can create metadata while downloading the payloads, or if the Payload Source Location is a non-AIX system, that the Repository Location must be an AIX system with RSCD Agent installed on it, so that the catalog can create metadata.- Network URL type for payload deployment ---- The Copy To Agent At Staging value is the default.
- Network URL for payload deployment ---- If the URL type is Copy To Agent At Staging, then this field autopopulates with the Repository Location value specified in the previous step.
- RBAC Policy ---- Optionally, browse to an ACL policy that you want to use to set ACLs on all files created by the catalog.
- Clear Download from Vendor. This option does not apply to Offline mode.

- In the Filters section, click Add. The Add AIX Filter panel appears.
- By Update Level: Define the TL/SP to include in the catalog by selecting filters. You must select at least one filter.

- Fix Type: Define the Fix Type to include in the catalog by selecting filters. You must select at least one filter.

- By Fix ID: APAR/PTF, select the type and enter the number in the text field.

- Click OK.
- Continue to select items from the Product drop-down list until your filter list is complete. The following example shows a completed AIX Catalog panel for Online mode with several filter selections.

The following example shows a completed AIX Catalog panel for Offline mode with several filter selections.

- Click Next to continue. The Schedules panel appears.

- Choose when you want the catalog update job to run. You have the following options:
- Do none of these options now, and plan to manually execute the job later.
- Check Execute job now to create the catalog immediately after you finish this wizard.
- Select a previously defined job schedule, if any exist, from the displayed list of schedules. (The example in the previous step does not show any defined schedules.)
- Click Add to define a new schedule. The Add New Schedule panel appears.
- On the Schedule tab, you can define a specific time to run a job one time, daily, weekly, monthly, or at other defined intervals.

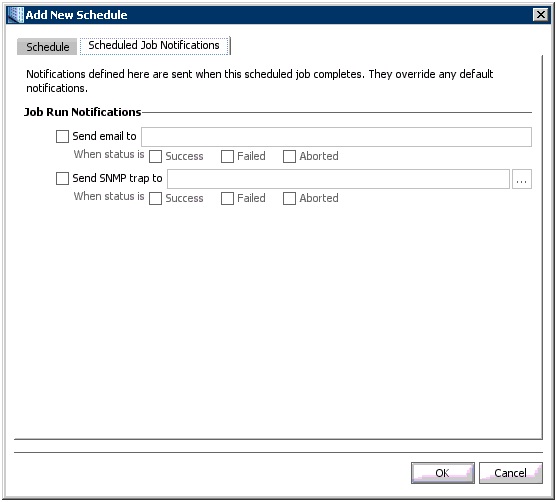
- On the Scheduled Job Notifications tab, you can define the type of notification that the scheduled job should send and under which circumstances the notifications are sent.
- Click OK to save the scheduling information and return to the Schedules panel.
- On the Schedules panel, click Finish. (You are accepting the default settings on the Step 4 panel and Step 5 panel of the New Patch Catalog wizard.)
- The wizard creates the Patch Catalog Job and adds an object for it in the Depot location that you specified on the first wizard panel.
Comments
Log in or register to comment.